>>

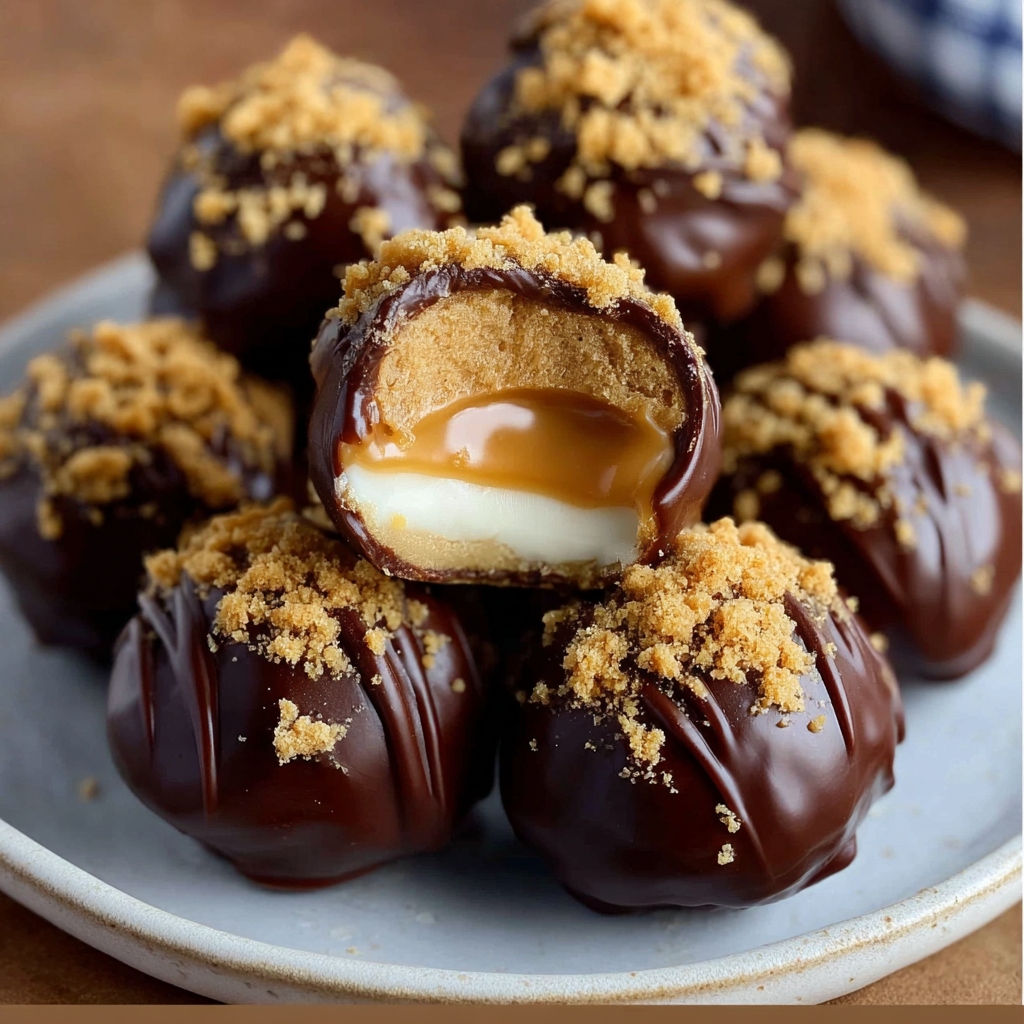
Bite-sized, no-bake treats that combine creamy peanut butter, tangy cream cheese, and a chocolate shell — perfect for parties or an easy fridge treat.
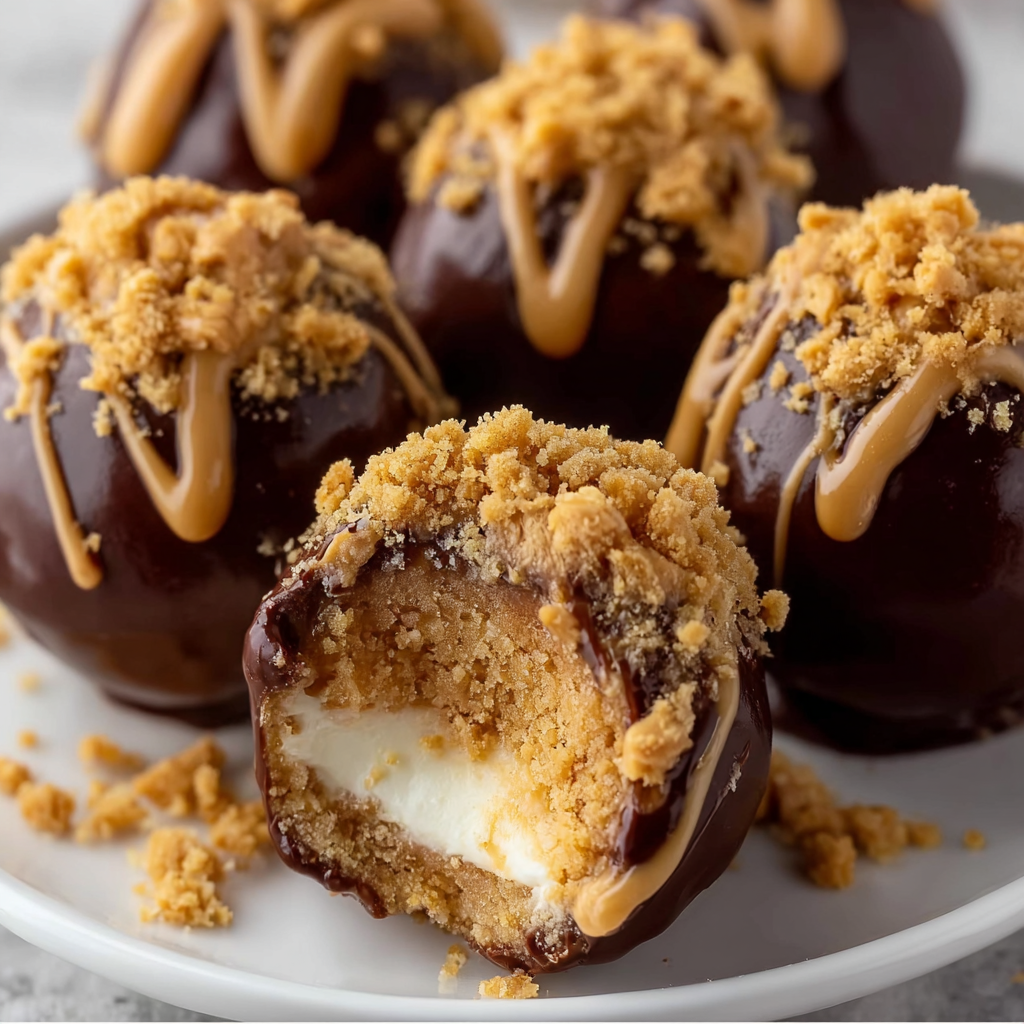
This recipe for No-Bake Peanut Butter Cheesecake Balls became my shortcut answer to every last-minute dessert request. I first improvised these on a rainy afternoon when a sudden invitation arrived and my oven was already occupied. The combination of smooth cream cheese, creamy peanut butter, and crushed graham crackers produced a texture that feels indulgent but requires surprisingly little effort. Each bite offers a tender, slightly tangy center wrapped in chocolate — the kind of dessert that disappears fast at family gatherings.
I discovered how versatile these little bites are: they travel well, keep for days in the fridge, and can be dressed up for celebrations with sprinkles or chopped peanuts. What makes them special is the balance of flavors — the tang of cream cheese cuts the richness of peanut butter, while the graham crumbs add just enough crunch to make each mouthful interesting. They’re my go-to when I want something decadent without heating the house or spending hours baking.
When I first brought these to a summer picnic, they were the first to go. My neighbor asked for the recipe on the spot, and a friend admitted she’d saved a few for a late-night treat. They’re proof that desserts that look and taste upscale don’t have to be complicated.
What I love most about these bites is their reliability — they’re forgiving to minor adjustments, and the flavor balance rarely fails. On busy weekends I double the batch and freeze extras; guests think I’ve spent much longer preparing them than I actually have. The crunch of a finely chopped peanut garnish always brings compliments, and they’ve become my staple for potlucks and school events.
Store the finished bites in a single layer or separated by parchment sheets in an airtight container to prevent sticking and preserve the chocolate finish. Refrigerate for up to 7 days; when freezing, arrange them on a tray until solid, then transfer to a freezer-safe container with parchment between layers. Label with the date — frozen pieces keep for about 3 months. Reheat briefly at room temperature for 10–15 minutes before serving if you prefer a softer center; never microwave directly as chocolate can melt unevenly.
If you need nut-free options, swap the peanut butter for sunflower seed butter and use dairy-free cream cheese to keep the creaminess. For a lower-sugar version, reduce powdered sugar to 3/4 cup and use a sugar-free chocolate for coating; texture will be slightly softer. To make them more decadent, mix in 1/4 cup mini chocolate chips into the filling. For gluten-free, replace graham cracker crumbs with gluten-free cookie crumbs or crushed toasted oats (use 1 1/4 cups).
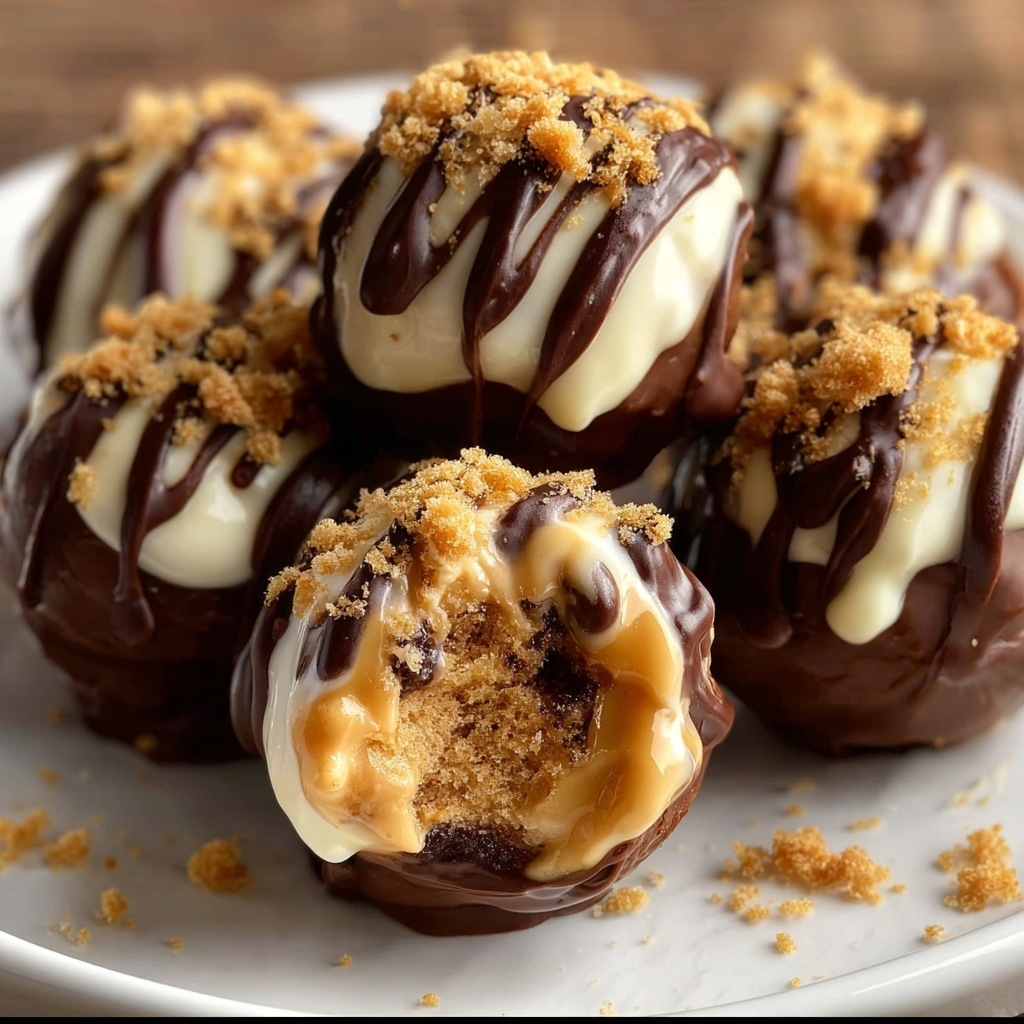
Present these on a decorative platter with small paper liners for each ball to make serving easy. They pair wonderfully with a cup of coffee or a glass of cold milk. For a party platter, arrange with fresh berries and mint sprigs for color contrast. Mini dessert spoons or cocktail picks make them easy to enjoy at standing gatherings. For holiday occasions, color-coordinate sprinkles or drizzle white chocolate for a festive finish.
While not a traditional confection from any single cuisine, these bites draw inspiration from American no-bake sweets and peanut-butter-forward desserts common in the U.S. The graham cracker element nods to classic American pie crust flavors, and the idea of a chilled, coated confection has roots in candy-making techniques where centers are enrobed in tempered chocolate. They’re a modern, simplified take on layered dessert flavors that are familiar in many American households.
In summer, keep them chilled and top with toasted coconut for a tropical twist. For winter holidays, add 1/4 teaspoon ground cinnamon and a pinch of nutmeg to the filling and top with crushed candy canes for peppermint notes. For spring gatherings, roll in finely chopped freeze-dried strawberries before coating for a bright, fruity accent. Adjust garnish colors to match seasonal themes for an instant festive presentation.
Make a large batch on a Sunday and portion into small containers for grab-and-go snacks throughout the week. Freeze extras uncoated to keep space in the refrigerator and dip them as needed — this approach keeps the chocolate fresh. When packing for lunches, place in a small insulated cooler or include an ice pack to maintain texture, especially in warm weather.
These peanut butter cheesecake balls are one of those recipes I share with friends because they look special but are genuinely simple. Make them your own by adjusting sweetness and garnish — and don’t be surprised when people ask for the recipe.
Soften cream cheese fully to room temperature to avoid lumps when mixing.
Chill the formed balls before dipping; slightly frozen centers reduce cracking and make coating faster.
Use a small cookie scoop for uniform bites and consistent serving size.
Melt chocolate in short bursts and stir thoroughly to prevent overheating and seizing.
If using natural peanut butter, adjust graham crumbs slightly to achieve the correct firmness.
This nourishing no-bake peanut butter cheesecake balls recipe is sure to be a staple in your kitchen. Enjoy every moist, high protein slice — it is perfect for breakfast or as a wholesome snack any time.
Yes — you can freeze the uncoated balls on a tray until solid, then transfer to a freezer-safe container for up to 3 months. Thaw in the refrigerator before dipping or serving.
If the chocolate seizes, stir in 1 teaspoon of coconut oil or neutral oil and warm gently. Avoid adding water.
Use a small cookie scoop for even size and freeze for 10–12 minutes before dipping to make coating easier.
This No-Bake Peanut Butter Cheesecake Balls recipe makes perfectly juicy, tender, and flavorful steak every time! Serve with potatoes and a side salad for an unforgettable dinner in under 30 minutes.
In a large mixing bowl, beat the softened cream cheese and peanut butter together until smooth and fully combined, about 1–2 minutes with a hand mixer. Add powdered sugar and vanilla extract, then beat until the mixture is homogeneous and slightly fluffy.
Gradually fold in the graham cracker crumbs with a spatula until the texture is thick enough to shape. Adjust with a little extra crumb or a teaspoon of milk to reach the right consistency.
Portion the mixture with a 1-inch scoop or by hand and roll into smooth balls. Place them on a parchment-lined baking sheet in a single layer so they don’t touch.
Refrigerate the shaped balls for at least 30 minutes so they firm up. If short on time, freeze for 10–12 minutes until just set.
Melt the semi-sweet chocolate with coconut oil (if using) in 20–30 second intervals, stirring between each until smooth and glossy. Avoid overheating to prevent seizing.
Dip each chilled ball into the melted chocolate using a fork, tap off excess, and return to parchment. Sprinkle with crushed peanuts or sprinkles before the chocolate sets, then refrigerate another 15–20 minutes to harden.
Last Step: Please leave a rating and comment letting us know how you liked this recipe! This helps our business to thrive and continue providing free, high-quality recipes for you.
Leave a comment & rating below or tag
@sararecipes on social media!
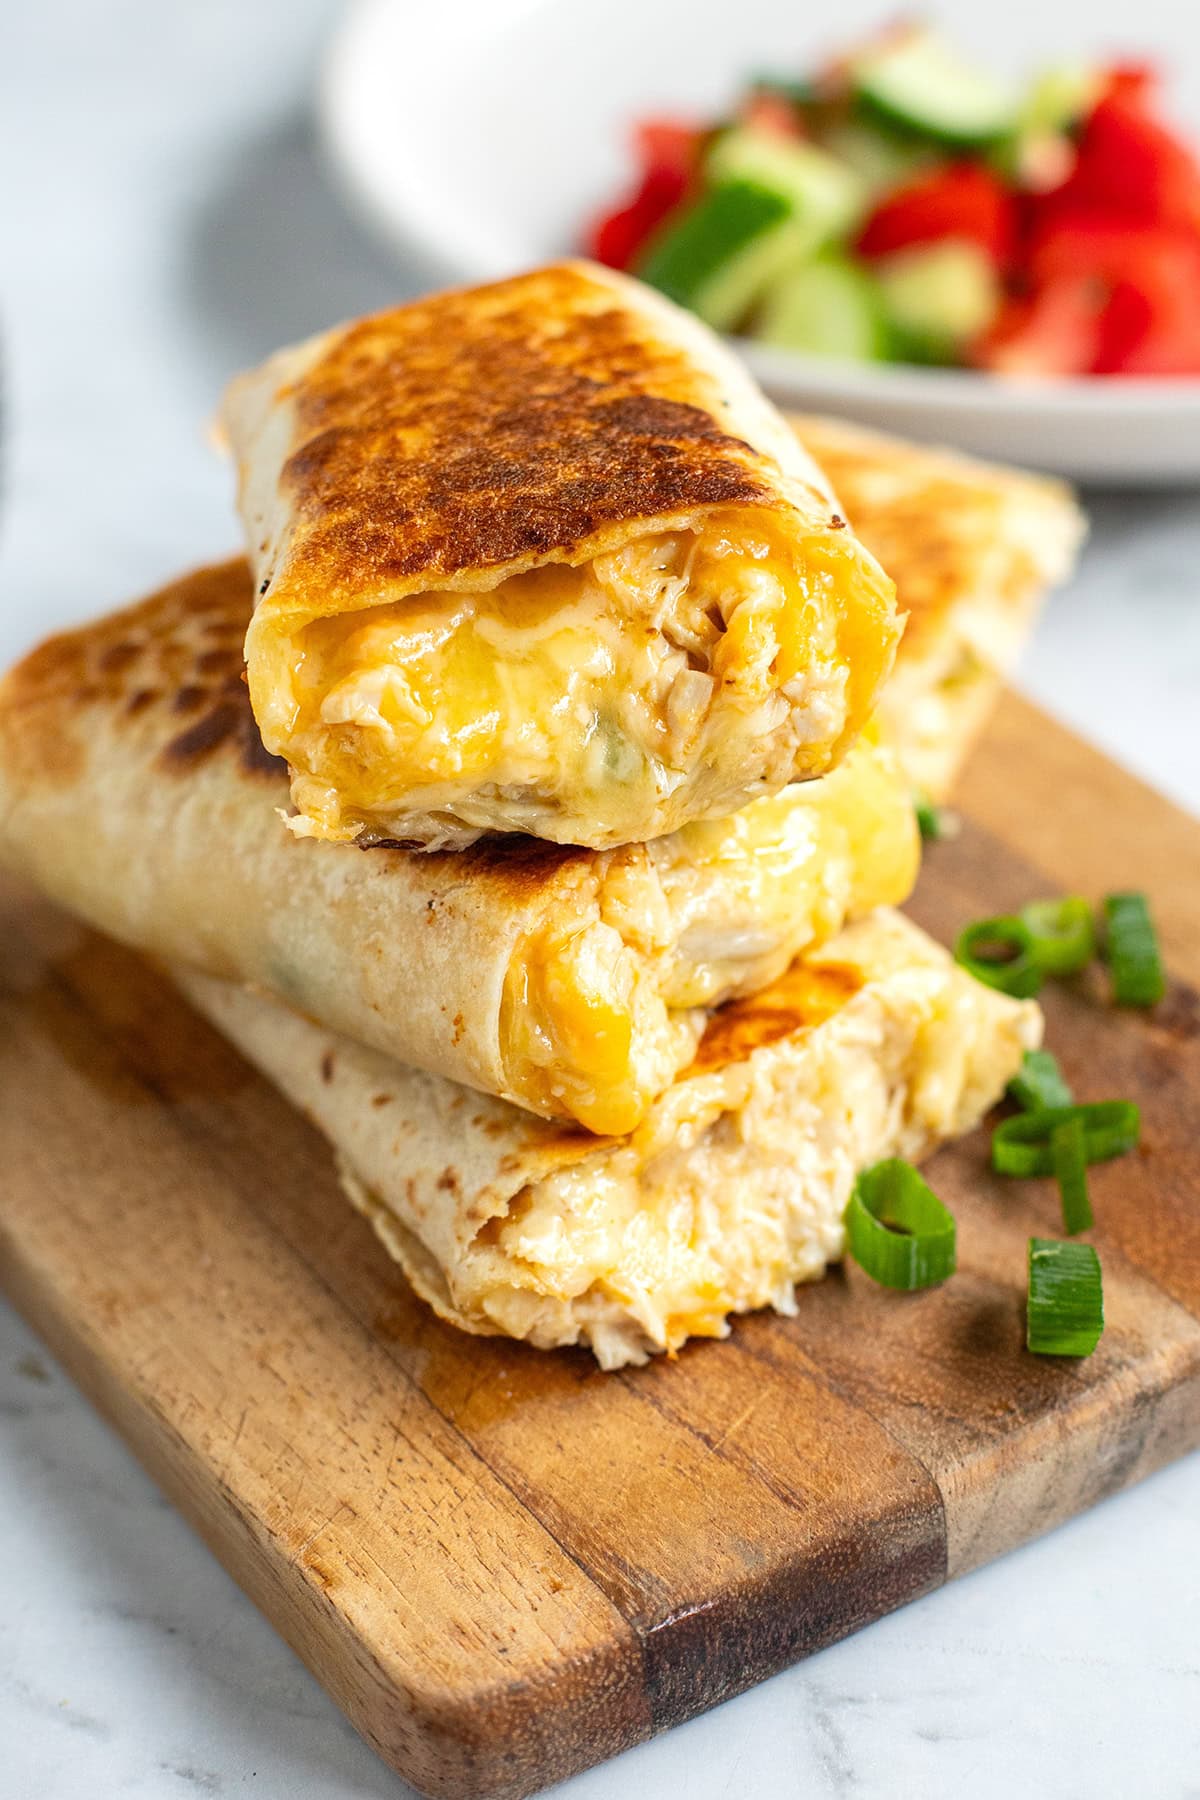
Golden chicken tucked into crisped tortillas with melty cheddar and mozzarella, plus a creamy garlic sauce. Weeknight-friendly and ready in 25 minutes.
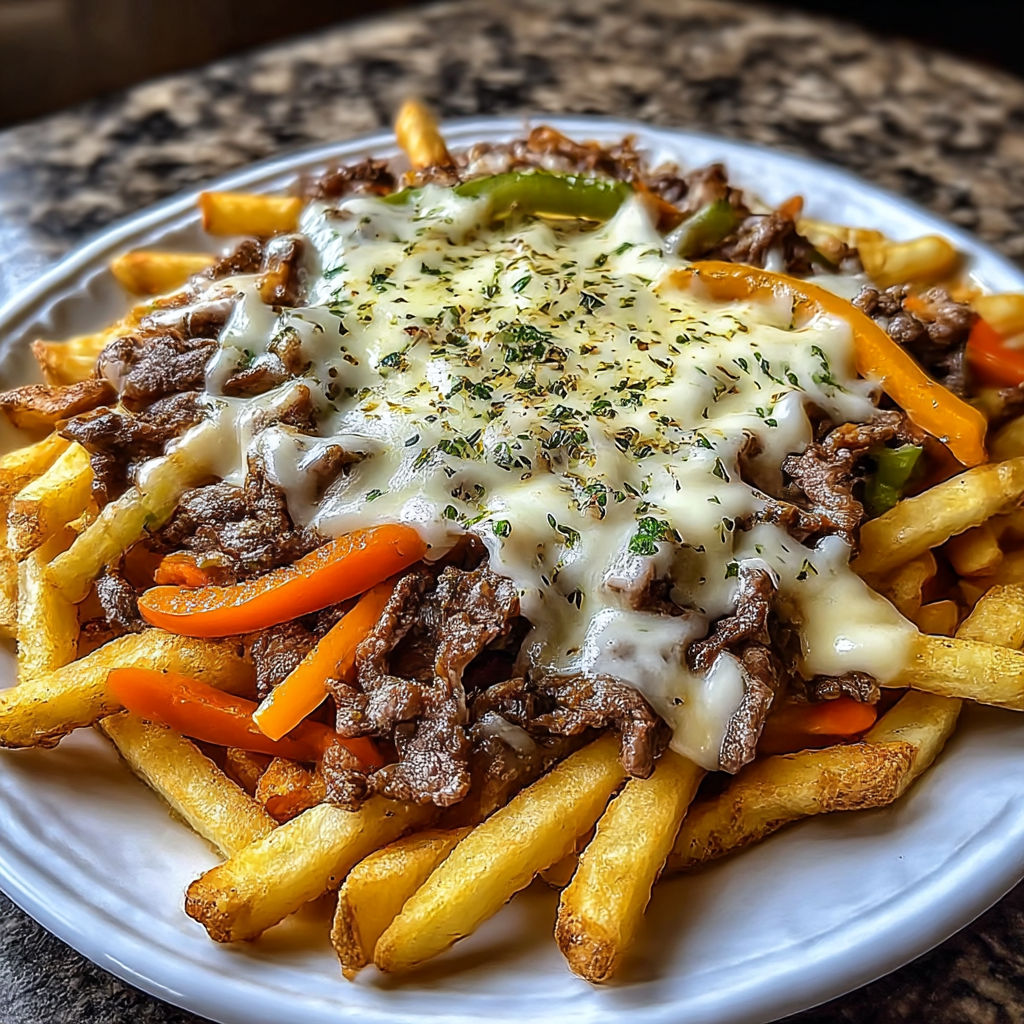
Crispy waffle fries piled with tender sliced steak, sautéed peppers and onions, and gooey American cheese—an indulgent, shareable skillet perfect for weeknight dinners or game-day gatherings.
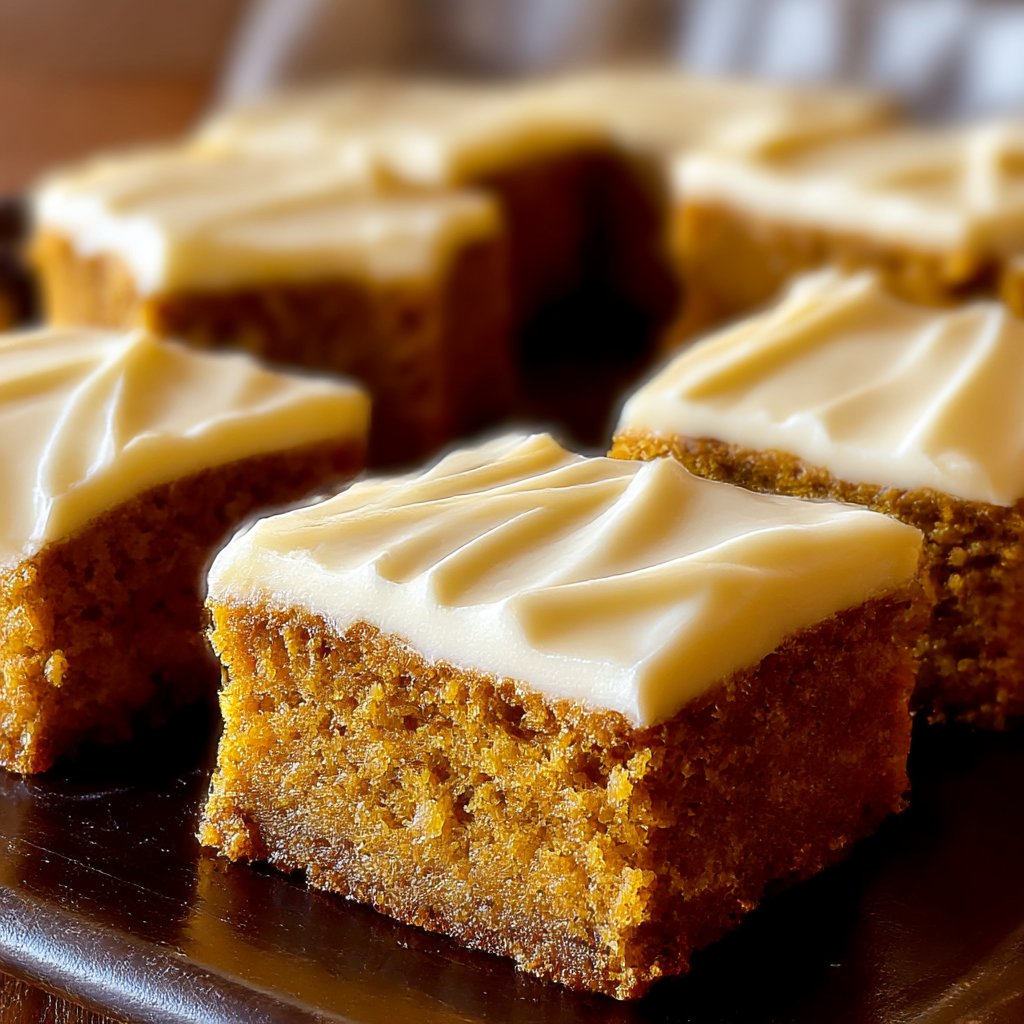
Tender, spiced pumpkin bars finished with a silky cream cheese frosting—perfect for fall gatherings, potlucks, and cozy afternoons.
Leave a comment & rating below or tag @sararecipes on social media!
Enjoyed this recipe? Share it with friends and family, and don't forget to leave a review!
This recipe looks amazing! Can't wait to try it.
Comments are stored locally in your browser. Server comments are displayed alongside your local comments.
Join to receive our email series which contains a round-up of some of our quick and easy family favorite recipes.