>>

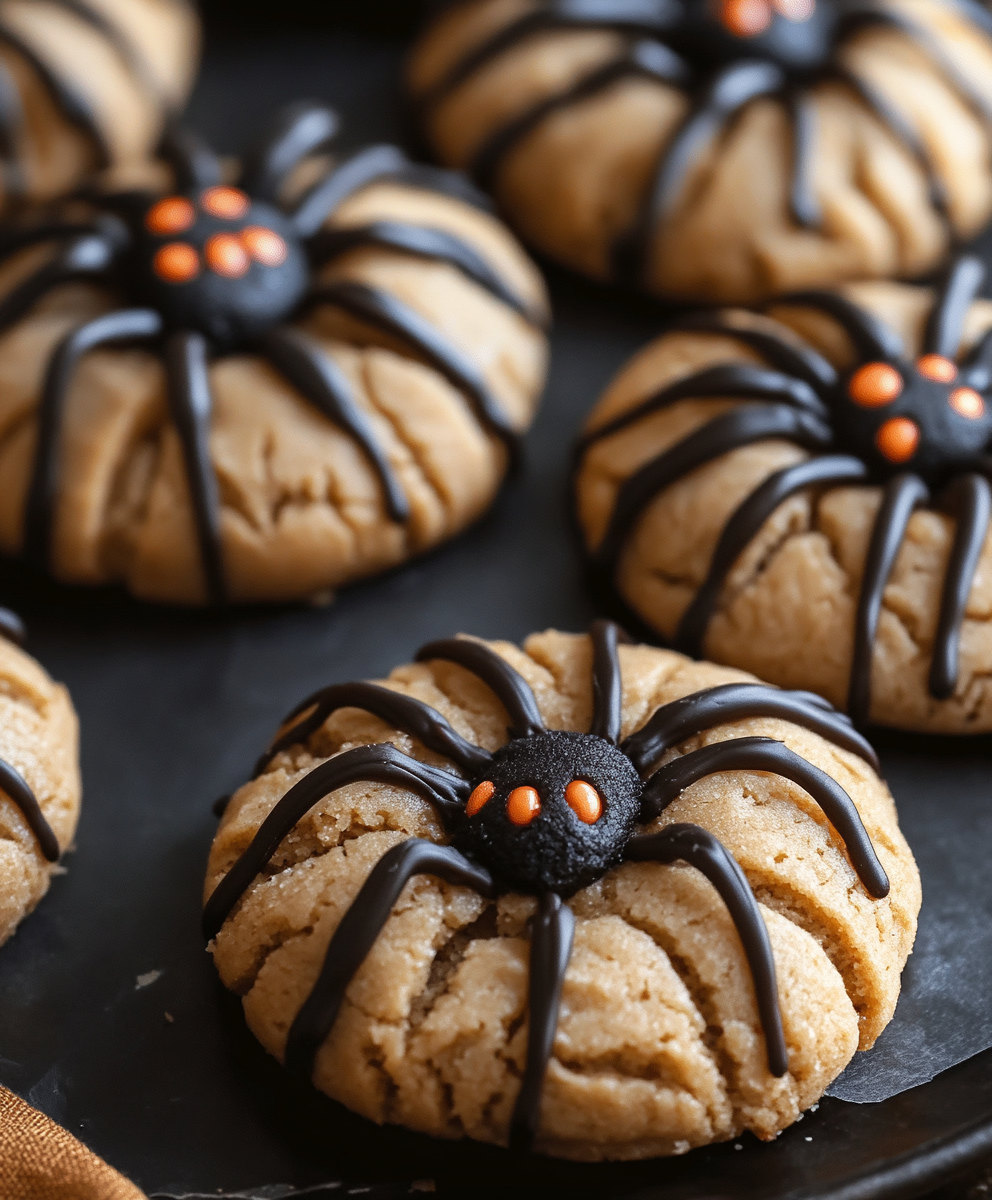
Crunchy-sugary peanut butter bites topped with chilled chocolate bodies, candy eyes and piped chocolate legs — a playful, kid-friendly Halloween favorite that's easy to make and budget-conscious.
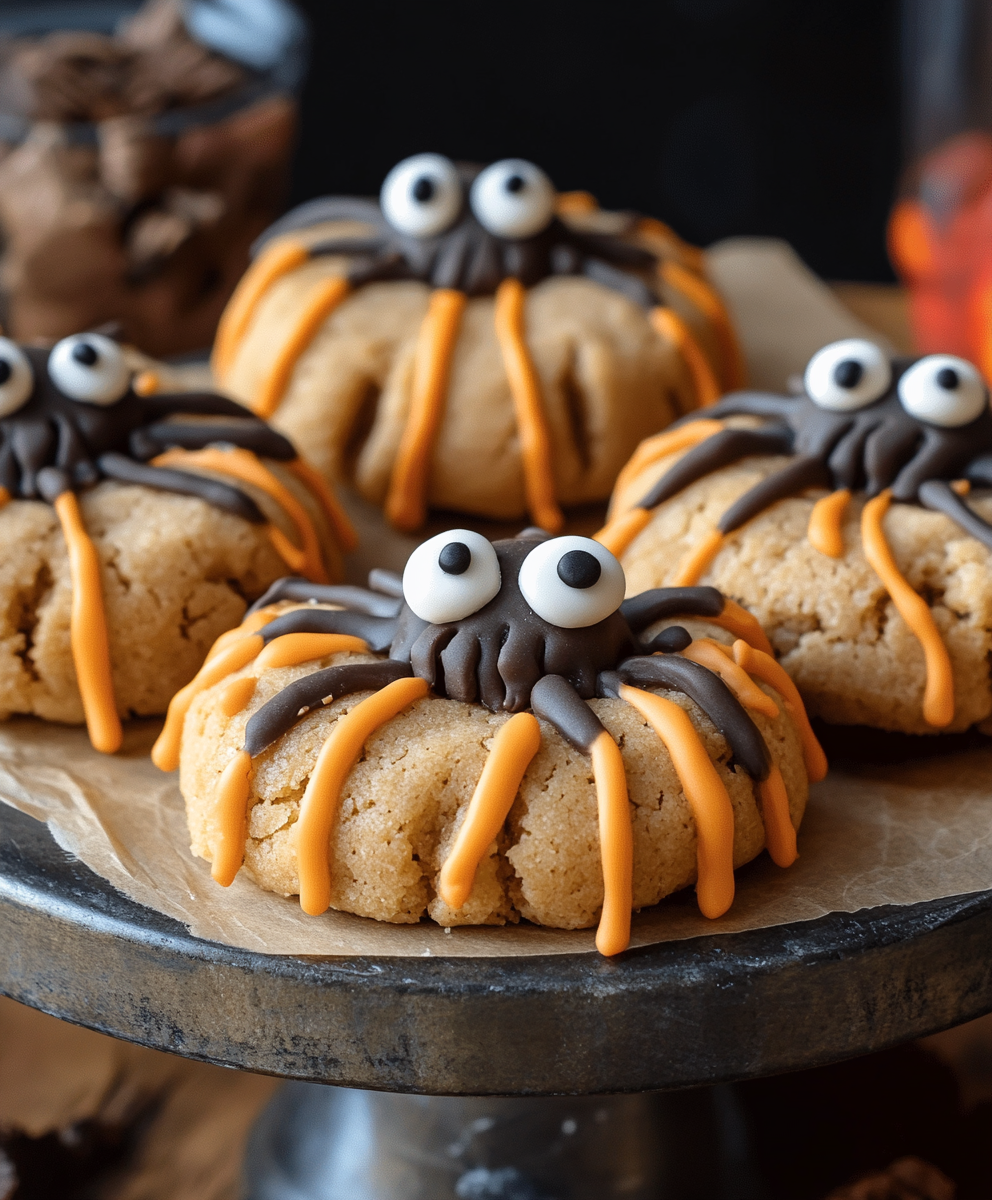
This playful peanut butter spider cookies idea became a Halloween tradition the first autumn I made them for a small school party. I was trying to create something spooky but simple enough for kids to help assemble, and these cookies checked every box: a familiar peanut butter flavor, a crunchy sugar exterior, and a candy-topped center that transforms a humble cookie into an irresistible little spider. I first discovered a similar concept on a recipe site and then simplified it to use fewer specialty ingredients and make the process faster and more affordable. The result was a tray of bouncy, slightly chewy cookies that children loved decorating and adults loved sneaking a few of.
What makes these especially memorable is the contrast of textures and flavors — the buttery-salty peanut butter base, a crisp sugared shell, the soft chocolate truffle center, and a pop of sweet frosting that holds the eyes and legs in place. The cookies are sturdy enough for little hands to decorate without falling apart, and the assembly step becomes a fun group activity. Over the years I’ve made these for classroom parties, neighborhood trick-or-treat swaps, and family Halloween movie nights. They always disappear fast, and I’ve learned small tricks — like chilling the chocolate before slicing — that make the process smooth and nearly foolproof.
I remember my neighbor’s eight-year-old proudly carrying a tray of these across the street, announcing them as ‘real spiders’ to the great delight of younger cousins. The assembly moment — piping the legs and sticking on the eyes — always draws a crowd. Simple changes, like adding a tiny ring of red gel around the eyes, turn the cookies into a scarier version for older kids and themed events.
One of my favorite parts is watching shy kids transform into little decorators — suddenly everyone wants to pipe legs and stick on eyes. The cookies travel well to potlucks and school events when arranged snugly in boxes, and they hold up nicely even after a short drive.
To preserve texture, store cookies in a single layer or with parchment between layers in an airtight container at room temperature for up to 4 days. If you need longer storage, freeze cooled, unadorned cookies in a freezer-safe container for up to 3 months; thaw overnight in the refrigerator and decorate the day you plan to serve. If decorated, keep refrigerated for up to 3 days because of the frosting and chocolate centers, and allow cookies to come to room temperature for 20 to 30 minutes before serving so flavors and textures are at their best.
If Lindt truffles are not available or cost-prohibitive, swap for mini peanut butter cups, small chocolate-coated caramel pieces, or cut a standard chocolate candy bar into discs and chill before slicing. To make these nut-free, replace peanut butter with sunbutter (sunflower seed butter) and use allergen-free chocolate and decorations; keep in mind flavor and texture will change slightly. For dairy-free needs, use a dairy-free frosting and check that chocolate candies are dairy-free. You can also use natural peanut butter — reduce added milk slightly to compensate for the thinner texture.
Arrange these on a dark platter to make the spider bodies pop, scatter edible spider web confetti or sprinkle powdered sugar around them for a moonlit effect. Serve with a bowl of milk, spiced cider, or hot chocolate for a cozy Halloween spread. For a kid party, place them on a tiered stand with other easy sweets like pumpkin-shaped sugar cookies and caramel apple slices to keep an autumn dessert theme. Garnish with small mint leaves or orange zest for an adult twist.

Decorated cookies have roots in many baking traditions where sweet confections are embellished for celebrations. The idea of turning a classic peanut butter cookie into a themed treat is distinctly American — using mass-produced candy eyes and chocolate truffles reflects mid- to late-20th century developments in confection availability. These cookies blend the homey, old-fashioned appeal of peanut butter cookies with modern candy decorations to create a festive, family-friendly holiday item commonly seen at Halloween gatherings across the United States.
For autumn gatherings, mix a teaspoon of pumpkin pie spice into the dough or sprinkle a hint of cinnamon into the sugar coating for added warmth. At winter holidays, swap the spider look for snowman faces using marshmallow halves and chocolate chips. For a spring-themed party, use pastel-colored candy eyes and white chocolate centers. Small changes in decorations instantly adapt the base dough to different seasons without altering the tried-and-true texture.
Plan assembly like a mini production line: bake and cool all cookies the night before, chill and pre-slice all chocolates, and portion frosting into small piping bags or disposable cones. Keep candy eyes in small bowls for quick access. Use shallow baking sheet liners or cupcake tins to transport decorated cookies securely. This approach minimizes frantic last-minute decorating and makes it easy to produce large quantities for classrooms or bake sales.
These peanut butter spider cookies are equal parts nostalgia and novelty — they are simple to make, endlessly adaptable, and reliably crowd-pleasing. Whether you’re making them with little hands or preparing platters for a Halloween luncheon, they’ll bring smiles and the occasional playful shriek. Try them once and you’ll find yourself swapping decorations to suit every holiday.
Chill chocolate truffles for at least 20 minutes before slicing to get clean halves without cracking.
Roll cookie balls in granulated sugar for a crunchy exterior and slight sparkle after baking.
Use a wooden citrus reamer or the blunt end of a wooden spoon to make consistent dimples immediately after baking.
Pipe spider legs with a small round tip and practice on parchment first for even pressure control.
This nourishing peanut butter spider cookies recipe is sure to be a staple in your kitchen. Enjoy every moist, high protein slice — it is perfect for breakfast or as a wholesome snack any time.
This Peanut Butter Spider Cookies recipe makes perfectly juicy, tender, and flavorful steak every time! Serve with potatoes and a side salad for an unforgettable dinner in under 30 minutes.
Preheat oven to 375 degrees F (190 degrees C). Line baking sheets with parchment paper and chill truffles in the refrigerator for best results when slicing.
In a large bowl, beat shortening, peanut butter, brown sugar, and 1/2 cup white sugar until smooth. Add beaten egg and mix thoroughly, then stir in milk and vanilla until combined.
Whisk flour, baking soda, and salt together and incorporate into the peanut butter mixture until a cohesive dough forms. Avoid overmixing to keep cookies tender.
Divide dough into 48 equal balls, roll in 1/4 cup granulated sugar to coat, and arrange 2 inches apart on baking sheets.
Bake 10 to 12 minutes until edges are lightly golden. Immediately press a dimple into each cookie center using the blunt end of a spoon, then cool on the sheet 10 minutes before moving to a wire rack.
Slice chilled truffles, place a half in each dimple (rounded side up), adhere two candy eyes using a dab of frosting, and pipe four legs on each side using chocolate frosting. Let frosting set about 30 minutes.
Last Step: Please leave a rating and comment letting us know how you liked this recipe! This helps our business to thrive and continue providing free, high-quality recipes for you.
Leave a comment & rating below or tag
@sararecipes on social media!

Golden chicken tucked into crisped tortillas with melty cheddar and mozzarella, plus a creamy garlic sauce. Weeknight-friendly and ready in 25 minutes.

Crispy waffle fries piled with tender sliced steak, sautéed peppers and onions, and gooey American cheese—an indulgent, shareable skillet perfect for weeknight dinners or game-day gatherings.
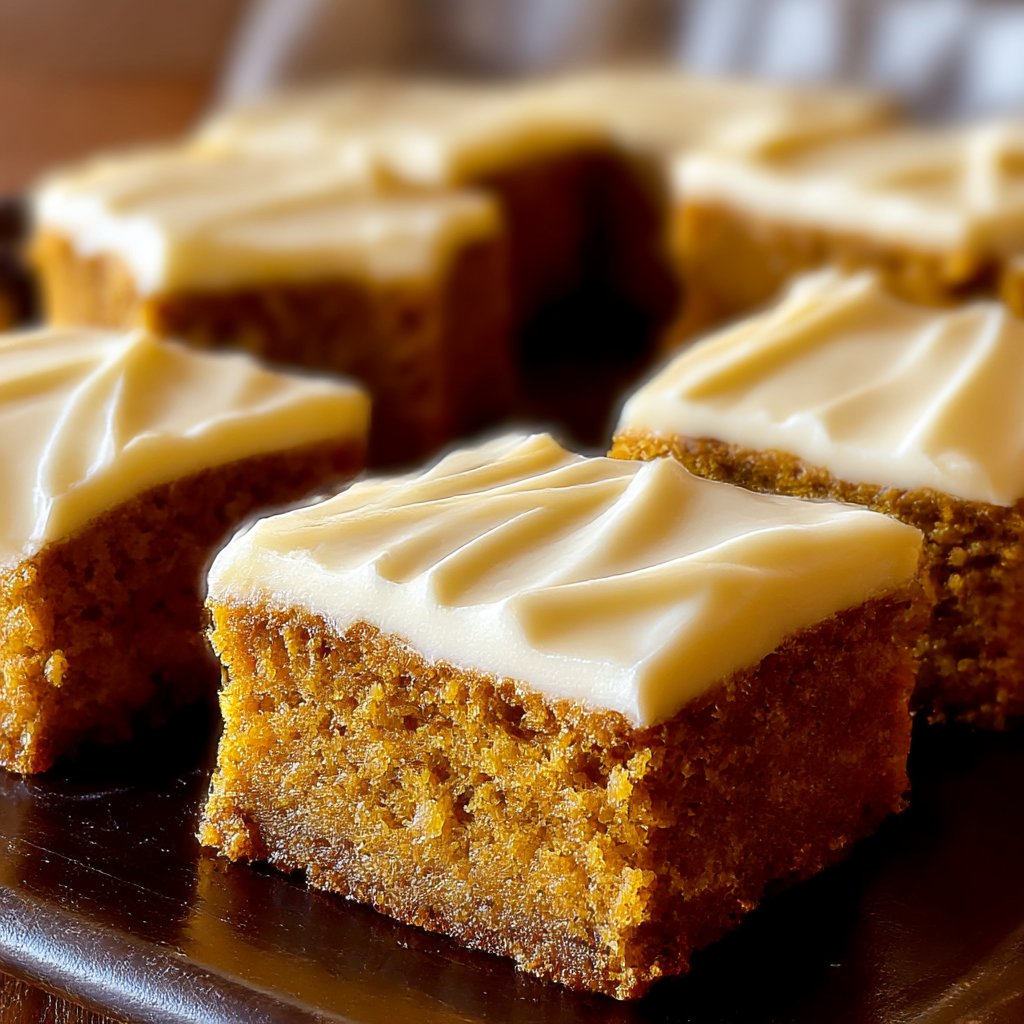
Tender, spiced pumpkin bars finished with a silky cream cheese frosting—perfect for fall gatherings, potlucks, and cozy afternoons.
Leave a comment & rating below or tag @sararecipes on social media!
Enjoyed this recipe? Share it with friends and family, and don't forget to leave a review!
This recipe looks amazing! Can't wait to try it.
Comments are stored locally in your browser. Server comments are displayed alongside your local comments.
Join to receive our email series which contains a round-up of some of our quick and easy family favorite recipes.